Robotic grippers compatible with Arduino. They are printed with a 3D printer.
Andromina Gripper 4 V1.1. These new robotic grippers presented in this post are ideal for mounting on any standard robotic arm or a robotic arm manufactured by a "Maker". Its futuristic design allows the manipulation of a variety of objects. The different holes on the grippers allow several positions of assembly.
In this post, you can see these robotic grippers to manipulate large objects. They are manufactured with a 3D printer, Prusa I3. The printer uses ABS plastic. The different 3D parts of grippers are assembled with stainless steel bolts of DIN-912 M-3 Allen bolts.
The main features of these robotic grippers are :
The grippers are robust and light.
The grippers allow the manipulation of large objects, with an size of 77mm.
The grippers allow two degrees of freedom, the opening and closing of jaws, and the rotation of the gripper.
The grippers uses two RC standard servo motors. One servo rotates between 0 to 180 degrees and the other servo is a 360 degrees servo, continuous rotation servo.
The gripper can be connected directly to all Arduino, Raspberry Pi boards and PICAXE boards or any other board.. The boards don't need shields. We can use the standard pins of Arduino.
The micro switch of the gripper designates the closing of the jaws.
This video shows an Andromina gripper 4 v1.1 controlled with a Arduino UNO board. The two servo motors are connected direct to the board, without shield. In this video the gripper manipulates a can of 0,33 kilograms (0,728 lb). The next pictures show the main details of this gripper.
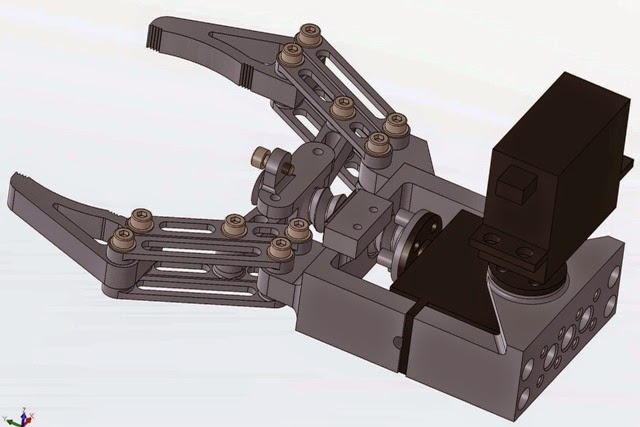
Robotic gripper with two servo motors.
The servo which rotate 0-180º is very strong and it has two ball bearings and has the main axis of metal. Also this servo has metal gears.
Robotic gripper with 4 jaws.
Top view of the robotic gripper.
Dimensions of robotics gripper of 4 jaws.
Limit switch of the gripper.
The next picture shows the connection scheme of the two servo with Arduino UNO. We do not need a Arduino shield to connect this two servos of the robotic gripper. It is good idea put a capacitor of 6,3 volts for maintain stable the current of pin with +5v.
Gripper scheme.
There are two designs in this moment, one with four jaws (Andromina gripper 4 v1.1) and one with two jaws (Androimna 2 v1.1). The above pictures showing the gripper with four jaws and next pictures showing the gripper with two jaws. In the future I'm going to design a gripper with six jaws (Androimna 6 v1.1) and maybe another three and five jaws.


No comments:
Post a Comment